Why photos beat the scale
Twelve weeks from now, the only proof of how far you've come is what you record at the start. The scale moves with water and salt. The tape moves with how you breathe. Four photos, taken the same way every week, don't lie.
A body swings two to four pounds from one morning to the next on water, salt and the size of last night's dinner. A tape around the waist moves with posture. Photos taken the same way each week show the change the numbers hide, especially in the weeks when you're adding muscle while dropping fat and the scale sits still and sulks.
In the program they're also what Jordan reads alongside your numbers at every check-in. More than once the photo set has caught a change a week before the scale admitted it.
In the 12-week program your photos upload to Trainerize under Progress → Photos. Only you and your two coaches see them. Nobody else, ever, unless you decide otherwise.
The setup
You're building a fixed camera, not taking a selfie. Everything about the shot should be boring and repeatable. Do this once and the rest of the weeks take care of themselves.
- Pick a corner and keep it
A plain wall with nothing on it and enough floor to stand six to eight feet back from the phone. Put a piece of tape on the floor where your feet go. Same corner every week, for twelve weeks.
- Prop the phone. Don't hold it
A shelf, a stack of books, a cheap tripod. Phone vertical, lens at about chest height, your whole body in the frame from head to feet. No mirror shots: your arms are busy, your phone is in the picture, and the angle changes every time.
- Light from in front
Daylight from a window in front of you is best, or a lamp beside the phone. Never light from behind: a window at your back turns you into a silhouette. Overhead-only light carves shadows that change with the weather and the time of day.
- Use the timer
Set a ten-second timer or use your watch as a remote. Walk to your mark, stand, breathe out normally, and let it fire. Take all four angles before you check any of them.
The four angles
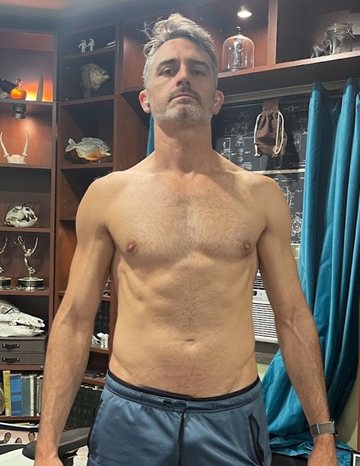
Work your way around: front, right side, back, left side. Here's my own week-one set. Nothing fancy: phone on a shelf, same corner, same light.
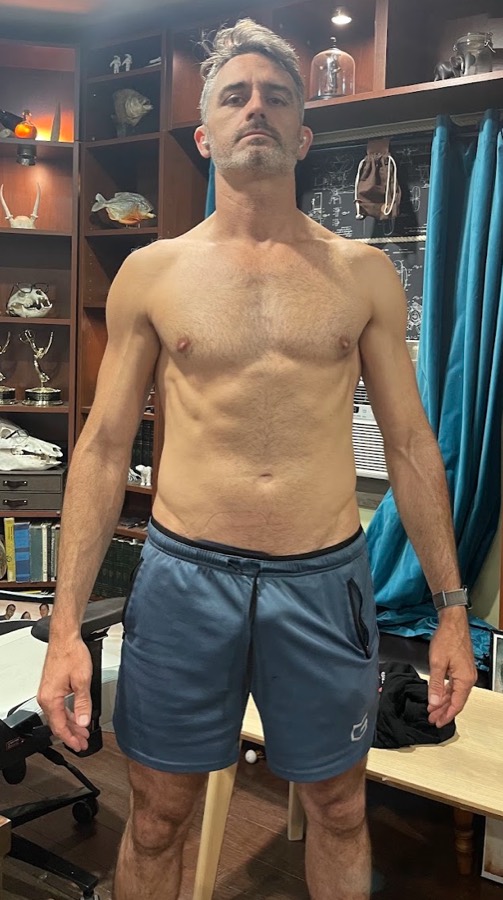
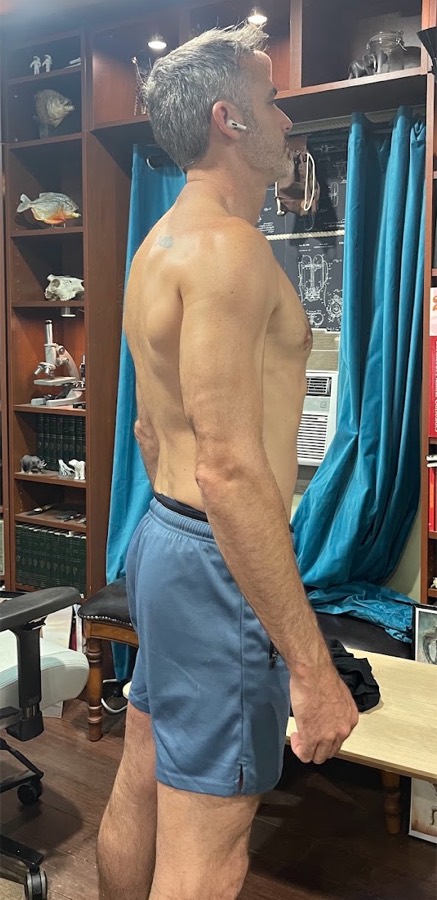
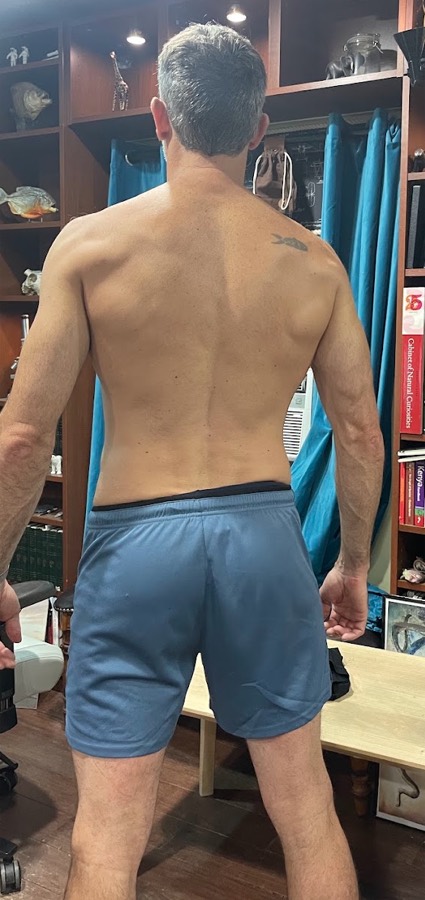
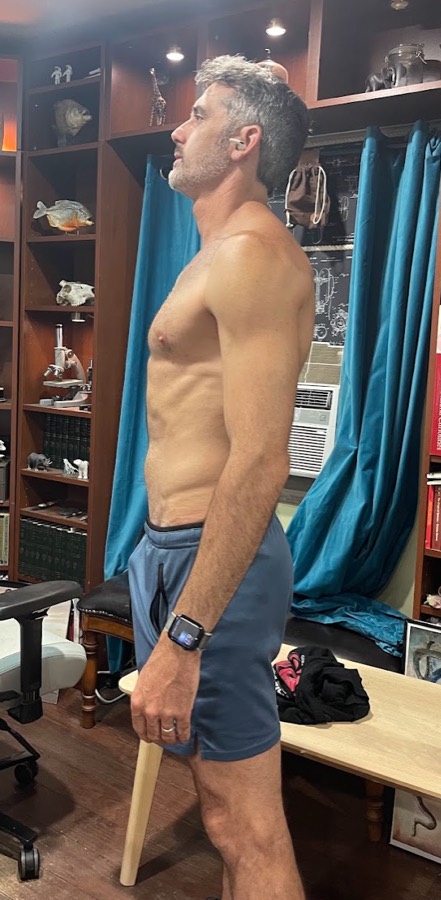
The pose
- Shorts only, or shorts and a sports bra. The same ones every week, so the waistband sits in the same place.
- Feet shoulder width, weight even on both legs, toes on your tape mark.
- Arms relaxed at your sides, hands open. On the side shots let them hang naturally; don't pull your shoulders back.
- Don't flex. Don't pose. Don't suck in. You're not trying to look good. You're trying to look the same, so the difference is real.
- Chin level, eyes on the lens for the front shot. Breathe out, then let the timer fire.
When to take them
In the morning, after the bathroom, before food or water. Same day every week. In the program your check-in lands on Wednesday, so Wednesday morning is the slot: weigh in, tape, photos, done. Weekly is the right rhythm. Daily photos are noise, and you'll start reading things into them that aren't there.
Keep the same
- Corner, wall and floor mark
- Light source and time of day
- Distance from the phone and lens height
- Shorts
- Day of the week
- Fasted, first thing
Don't
- Flex in week six "just to see"It ruins the comparison and you know it
- Step closer to the phone when it's going well
- Shoot after a workoutThe pump is a lie that lasts an hour
- Shoot after a big meal or a late night
- Use portrait mode, filters or a mirror
- Skip a week because you don't feel like itThose are the weeks that matter most
Keep them where you'll find them
In the program: Trainerize, under Progress → Photos, dated automatically and sitting next to your measurements. On your own: one album on your phone called Check-ins, nothing else in it.
Every four weeks put week one next to the latest set, side by side. That's the moment all of this is for. The scale will have had its good days and bad days. The photos will tell you what actually happened.
Photos, weight and five tape measurements taken the same morning are the whole record. The Macro Counting Guide covers the food side, and the sample meal plan shows what a day of hitting your numbers looks like.






.jpg)
